
Last year, I decided to start a blog. Mostly because I consume a lot of blogs, e.g. when I look for new projects or need help building them. At that time I chose ghost and I liked it, but recently I decided that I’d like to switch to Hugo, mainly for two reasons:
- I’m a software developer, so I like coding and git and writing a blog with Hugo feels like doing exactly that.
- The
hugo server -Dcommand not only enables me to view how the articles will look like, but also allows me to easily adjust the template I’m using, to fit my needs.
I run my own virtual root server, which provides a GitLab instance in a Docker container, orchestrated by Portainer. It just felt naturally, to locally write and edit articles, then commit and push them to GitLab, which would then build the site before it is finally deployed to my server, ready for you to see.
Research
I was pretty sure, that someone else would have implemented something similar and just after a few minutes on DuckDuckGo I found this fantastic blog post from Florian Franke, which came pretty close to what I wanted, except for the automatic deployment.
Concept
Anyhow, based on Florian’s work, I came up with the following concept:
- The site is stored under version control in a git repository, which is provided by the aforementioned GitLab instance.
- Together with
hugo server -DI can have quick iterations on the website locally, before I commit and push the changes to Gitlab. - Each push triggers a runner, which then builds a docker image, containing not just the static websites of the blog, but also NGINX for serving the site.
- Once this container is successfully built, it is pushed to Docker Hub
- Since the server to which the site shall be deployed, is already running Portainer with Watchtower, I configured it such, that upon availability of a new blog docker image, that image is automatically pulled, and then scheduled to replace any obsolete previous instance of this blog.
- Although NGINX alone would be sufficient, I run the final container with the blog and NGINX, behind a Traefik proxy. This trafic proxy, sits in front of all websites, which are orchestrated by my Portainer instance, and as such is configured through labels in Portainer’s docker-compose file. Besides the actual routing, Trafic takes care of provisioning Let’s Encrypt certificates for all the websites on my server automagically.
Approach
Setting up the Git Repository
As I already pointed out, I run my own GitLab instance for this. This is not a hard requirement, Github may also work, but GitLab comes with integrated CI/CD, which does its job pretty well. GitLab would even allow me to run my own Docker registy to host the containers for the blog. But I never really had the need for a private registry yet, and since the blog is going to be publicly accessible, I don’t see any issue having Docker Hub host it for me.
So inside GitLab, I create a new project with a small Readme.md file. Nothing out of the ordinary here. However, eventually, we’re going to need credentials for pushing the built Docker image to Docker Hub. Luckily, GitLab allows me to set variables, so that I don’t have to put my credentials in the actual repository. For this I go to Settings -> CI/CD -> Variables and create two variables:
DOCKERHUB_USER- The username for Docker Hub.DOCKERHUB_TOKEN- The auth token, which I found on my profile page on Docker Hub.
Creating the First Site
With a simple git clone I clone the repository to my local machine. Additionally, I install Hugo onto my local machine. There are dockerized versions of Hugo available, but I chose the one, that comes with my distribution’s package manager, for ease of use.
There is a nice quick start guide, which I follow until after configuring the actual site, i.e. setting the URL of the final website. I’m not going to make the site particularly fancy just yet. The default template will do for now.
I can recommend to .gitignore the public folder, as I do not want to accidentally commit some intermediary version of the site. Remember, we want GitLab to build the site automatically.
Running First glimpse at the new page.hugo server -D makes the page available at http://localhost:1313.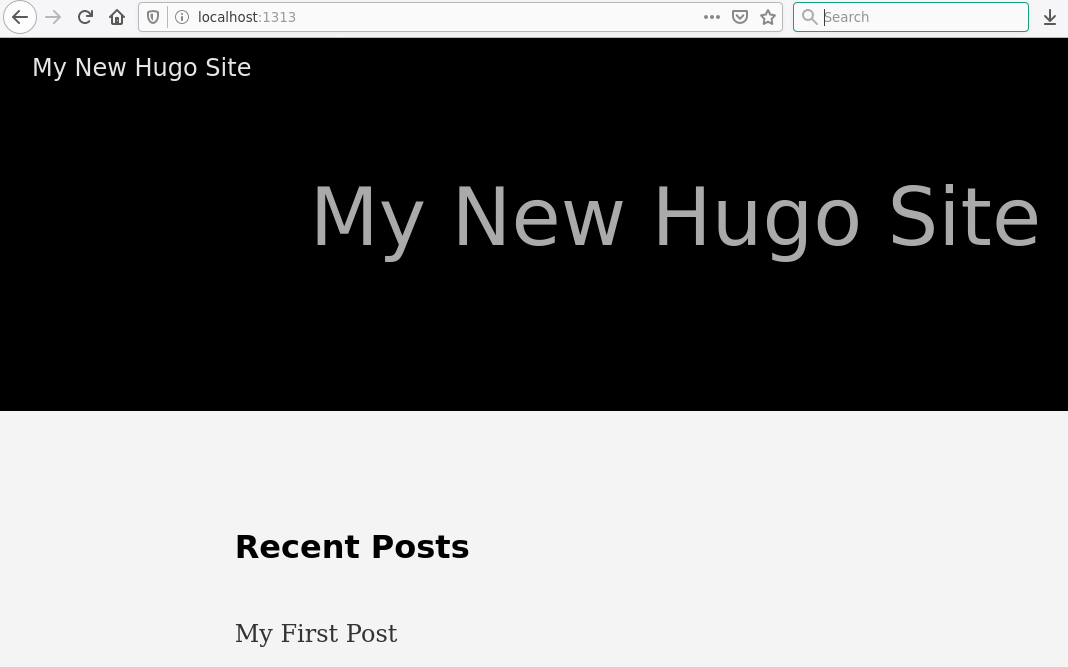
I am pretty happy with the results from the quick start tutorial, so I git add all the files and git commit afterwards.
Setting up the CI/CD Pipeline
Before I actually push the site, I need to set up the CI/CD pipeline, i.e. tell GitLab what it has to do to build the docker image and push it to Docker Hub. This is a two-step setup. First, I describe the Dockerfile, that will later contain the blog served by NGINX. Second, I create the .gitlab-ci.yml that tells Gitlab what to do with the Dockerfile and the resulting docker image. Through Florian’s example I learned about multi-stage Dockerfiles and I love the concept, so here is the Dockerfile:
# stage 0: install hugo and build the site
FROM alpine:3

ENV HUGO_VERSION=0.63.2 \
    HUGO_SITE=/srv/hugo

RUN apk --no-cache add \
    curl \
    git \
    libc6-compat \
    libstdc++ \
    && curl -SL https://github.com/gohugoio/hugo/releases/download/v${HUGO_VERSION}/hugo_extended_${HUGO_VERSION}_Linux-64bit.tar.gz \
    -o /tmp/hugo.tar.gz \
    && tar -xzf /tmp/hugo.tar.gz -C /tmp \
    && cp /tmp/hugo /usr/local/bin/ \
    && apk del curl git\
    && mkdir -p ${HUGO_SITE} \
    && rm -rf /tmp/*

WORKDIR ${HUGO_SITE}

COPY . ${HUGO_SITE}

RUN hugo

# stage 1: copy the static site into an nginx image
FROM nginx:latest

COPY --from=0 /srv/hugo/public /usr/share/nginx/html

CMD ["nginx", "-g", "daemon off;"]
As you can see. Stage 0 installs the extended version of Hugo into the container and runs the hugocomand, which actually builds the site into the /srv/hugo/public directory. Afterwards stage 1 is just the nginx:latest image, into which the static site, built by Hugo, is copied.
I locally execute docker build -t sesceu/blog.sesc.eu . to make sure, that the site actually builds and the Dockerfile does everything right. Then it’s time to tell GitLab how to do this, through .gitlab-ci.yml:
image: docker:latest
services:
- docker:18-dind

stages:
  - build
  - test
  - release

variables:
  DOCKER_HOST: tcp://docker:2375/
  DOCKER_DRIVER: overlay2
  DOCKER_TLS_CERTDIR: ""
  TEST_IMAGE: $DOCKERHUB_USER/blog.sesc.eu:$CI_COMMIT_REF_NAME
  RELEASE_IMAGE: $DOCKERHUB_USER/blog.sesc.eu:latest
  GIT_SUBMODULE_STRATEGY: recursive

before_script:
  - docker login --username $DOCKERHUB_USER --password $DOCKERHUB_TOKEN

build:
  stage: build
  script:
    - docker build -t $TEST_IMAGE .
    - docker push $TEST_IMAGE

test:
  stage: test
  script:
    - docker pull $TEST_IMAGE

release:
  stage: release
  script:
    - docker pull $TEST_IMAGE
    - docker tag $TEST_IMAGE $RELEASE_IMAGE
    - docker push $RELEASE_IMAGE
  only:
    - master
I create a pipeline with three stages: build, test and release, all of which are based on docker:18-dind. So, this is using Docker inside Docker to build the actual image for the blog. Thus, I need to make sure to set priviledged=true in Gitlab runner’s configuration file. Otherwise I end up having connection failures to the docker daemon. The variables section defines some variables for the GitLab runner, plus variables for the names of the test and release images to be created. Eventually, you may want to try different themes for hugo, which are usually git submodules somewhere underneath the themes/ directory. To tell GitLab to recursively pull also any git submodule before building, I add GIT_SUBMODULE_STRATEGY: recursive.
Now before entering any of the three stages, I login to Docker Hub. This is where the variables created earlier in GitLab are actually used. The three stages, are pretty simple. In build the site is actually built and pushed as TEST_IMAGE to Docker Hub. The test stage consists of pulling the image. Ideally I would run the container, and check if the page is actually available through NGINX, but for now I just verify, that the image that was just pushed can be pulled again. If testing succeeded, the release stage tags the docker image with the RELEASE_IMAGE and finally pushes the new tag to Docker Hub.
Now it is time to git add both new files and then finally push the commits to Gitlab. After pushing, the build pipeline should automatically been triggered and, if successful, the docker image with the new blog will be available on Docker Hub.
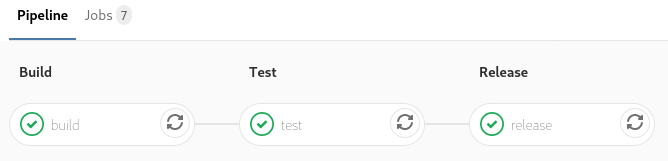
Successful execution of the build pipeline.
Setting up Portainer and Watchtower
Until now, I managed that the website is automatically built into a docker image, whenever I push any changes to the site’s git repository. The resulting image is available on Docker Hub, but it is not yet deployed and thus not visible to the outside world. This is what I do now.
As I mentioned earlier, my server is running Portainer with Watchtower. While Portainer is the container orchestrator, Watchtower, which itself is running inside a docker container, regularly polls Docker Hub for updated images of containers, running on the same Docker host, with a specific label assigned. In case an updated image is available, Watchtower pulls that image and replaces the running instance of that container with the new one. I am using the ‘stacks’ feature of Portainer. Thus Watchtower is defined following the Docker-Compose syntax:
watchtower:
  image: v2tec/watchtower
  container_name: watchtower
  command: --cleanup --label-enable
  labels:
  - "com.centurylinklabs.watchtower.enable=true"
  volumes:
  - /var/run/docker.sock:/var/run/docker.sock
In the same stack configuration, I add the following snippet for the actual website:
blog_sesc_eu:
  image: sesceu/blog.sesc.eu:latest
  container_name: blog.sesc.eu
  labels:
  - "traefik.backend=blog.sesc.eu"
  - "traefik.frontend.rule=Host:blog.sesc.eu"
  - "traefik.enable=true"
  - "traefik.port=80"
  - "traefik.default.protocol=http"
  - "traefik.docker.network=sesceu_traefik_proxy"
  - "com.centurylinklabs.watchtower.enable=true"
  networks:
  - traefik_proxy
Under labels you see the configuration, that on the one hand makes Traefik route incoming traffic for https://blog.sesc.eu towards this container, onto http port 80. Remember, Traefik is dealing with certificates and https, so the route from Traefik to the actual blog-container does not need to be encrypted. On the other hand, the label com.centurylinklabs.watchtower.enable=true, tells Watchtower to regularly check for and then pull updates to the sesceu/blog.sesc.eu:latest image on Docker Hub.
And that’s it. Now, whenever I push an update to the site, Gitlab builds the new docker image, pushes it to Docker Hub, and Watchtower will eventually pull it and replace any running instance of the blog with the new version.
If you find this post helpful, or if you’ve any question or proposal, just let me know!